Showing posts with label sweets. Show all posts

Tuesday, April 30

What I ate :: Cookie Bowl & Ice Cream


Those of you who follow me on instagram may have seen a snap of my dessert last Saturday night. Jack and I had my sister over and we got a little ambitious. We started our meal off with savoury waffles topped with steak, peppers, onions mushrooms and a provolone cheese sauce - which we named... wait for it... Philly Cheesesteak Waffles! uh-yeah, we went there. After such an AMAZING meal [which will be posted next week] our dessert had to be equally amazing. Enter, pinterest.
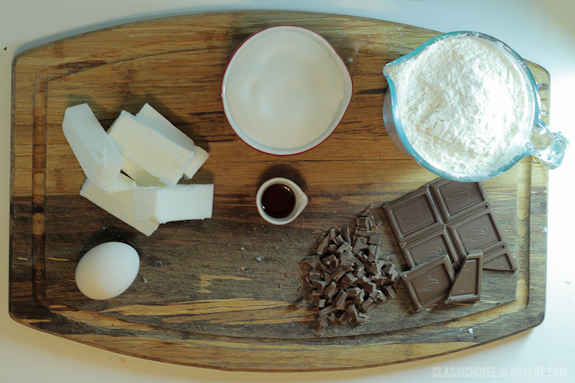


I had pinned the cookie bowl recipe a while back knowing that it was sure to come in and handy - and boy did it ever! The process is as simple as the recipe and even though we tossed in some chocolate bits - weakening the structure of the dough - they still held up beautifully. I think my favourite ingredient for this one was the touch of almond extract which adds an amazing roundness to the whole flavour.


Mixing the dough with your hands is an obvious must if you lean towards the impatient, as I do. This also allows you to feel if the dough is too dry - which mine was. If this is the case just add a tablespoon of milk and then give it another try. I think I added two all said and done.


When it came to rolling out the dough, I placed mine in between two sheets of saran wrap. I was a little nervous my dough was too sticky after the milk and didn't want to deal with the rolling-pin mishaps because of that. I rolled out the dough to approximately an 1/8" - I may suggest you go a little thinner. Although there are no added rising agents in the recipe I'm guessing my flour had some and personally, I prefer a dainty bowl to a sturdy one.


I used the cutter from my Breville Personal Pie Maker to get the 4.5" rounds I needed but I think a larger rimmed bowl would have worked just as well. As we were trying to be good - or at least not full-on gluttons [remember this was proceeded by Philly Cheesesteak Waffles] - we only cut three bowls. We then separated the remaining dough into individual portions and froze it for another time- or to be eaten frozen at midnight, tomato - tomahto.


This part was a little tricky as the chocolate would cause tears in the dough where it folded over the edge of the muffin mold. I just tried to patch it up as best as possible and gently push the edges of the dough in closer so they were resting against the mold and less likely to hang. We used coconut oil to grease the molds.


We baked at 350 for about 13 minutes and then let them cool for 10. We then gently pried them from the pan using a spatula and stuffed them full of ice cream, strawberries and chocolate. I have no regrets. 
   
ingredients below 
 

INGREDIENTS:
         2 3/4 cup flour   1 teaspoon salt
         1 cup unsalted butter 1 1/2 cups granulated sugar
         1 egg 1 1/2 teaspoon vanilla
         1/2 teaspoon almond extract                       

Monday, April 15

mmmMonday :: brown sugar


Did you all know how easy it is to make brown sugar!? It is crazy easy. I had no clue until last week when I was overcome with an intense need for chocolate chip cookies. Unfortunately we were out of brown sugar and this obviously hit during the pout-inducing April snow-storm and coincided with my refusal to leave my home. As baking chocolate chip cookies without brown sugar is completely out of the question I had to get creative ...or leave my house.  


INGREDIENTS:

1 cup granulated sugar
1 Tbsp molasses


Pour molasses onto white sugar. Mix with a fork or wooden spoon. Five minutes later you have the freshest, fluffiest brown sugar you will have ever seen ...and you didn't even have to venture out into that horrible snow storm.


Monday, March 4

mmmMonday :: Peanut Butter Rice Krispies Squares


Five words, guys - Peanut. Butter. Rice. Krispies. Squares. Seriously. No lie. I've made these, eaten these, and made them again... because I wasn't supposed to just eat them - they were meant for a pot luck. 


Peanut butter has a habit of causing a meth-like dependency in me. If it's been a while since my last taste I find myself unable to concentrate, I grow cranky and I begin to do almost anything within my power to get my hands on some. Peanut butter and chocolate? WELL just go ahead and consider that my blue meth - I'm a goner.


Nothing fuels my addiction quite like pinterest and when I stumbled upon this particular photo, I was feeling quite weak. Obviously my cupboards aren't filled with hundreds of peanut butter cups on a regular basis [that is not the road to recovery] so I had to run out a buy a couple of supplies.


The process itself is really quite simple: make rice krispies, add peanut butter, add peanut butter cups. This was perfect considering that by the time I returned home, arms loaded with all the necessary bits and bobs, it was past my bed time. 

INGREDIENTS:
                        
.25 cups butter
                        
1 teaspoon vanilla
                        
8 cups rice krispies
                        
.25 cups creamy peanut butter
                        
40 large marshmallows
                        
21 peanut butter cups 
                        
1 cup peanut butter chips, melted


Start by melting your butter over medium to low heat, throw in the marshmallows and keep stirring while it melts. While this melts lay down aluminum foil in your pyrex. Lightly grease the aluminum foil with oil [I chose coconut] and then lay out the peanut butter cups. I grossly underestimated the number of peanut butter cups that were required [I think I had 12] so I got a little creative with the peanut butter chips. Funny story about those peanut butter chips.. I picked up the wrong ones - they wouldn't melt and drizzle the way they should have so at least this way they were put to use!


Once the marshmallows are mostly melted, add the vanilla and the peanut butter and stir. Take off heat and add the rice krispies. Stir it all together to combine. Once the cereal is coated, add the mixture to the pan on top of those delicious, little cups.


Pat down the mixture into the pan lightly and let it settle, about 15 minutes. Once solid, use the edges of the aluminum foil to pull it out of the dish, flip it over and then put it back in and peel back the foil. It's at this stage that you would drizzle your lovely, melted peanut butter chips if you bought the right ones. 

Since I did not, it was at this point that I cut myself a square and enjoyed a treat.. a midnight treat that led to a couple more, followed by a sleepless night fuelled by a sugar-induced need to work through life's problems. Here's hoping you make these in the afternoon. 


Friday, June 22

Food Friday: vegan brownies!


Let's just say these brownies are delicious. I'm just going to put that out there right away... you need to know what you're getting into. Right now you're thinking, I'm going to give these vegan brownies a shot because they're healthy-ish and I want chocolate. But you don't know. You don't know that they are actually the best brownies you will ever have. You are unaware that this no-bake, 4-ingredient brownie batter with a 3-ingredient icing will be the death of any summer-living healthy-eating pipe dream you had. Now you've been warned, so please, enjoy.


                BROWNIE  
1/2 cup cocoa powder
2 cups hazelnuts
1 cup pitted dates
1/4 cup maple syrup
                                ICING  
1/4 cup cocoa powder
1/4 cup + 2 Tbsp maple syrup
1 medium avocado
...


This recipe is definitely much easier if you have a legitimate food processor. However, my little wannabe did me just fine. If you do have a food processor, pulse the hazelnuts until finely ground into a flour. Next, add in your dates, 1/2 cup cocoa powder and 1/4 maple syrup processing into a thick dough that sticks together.

If you don't have a nice, big food processor, do the same but in bunches that your little wannabe can handle. Slowly but surely. Don't get impatient, it's definitely worth it. I did the hazelnuts first, set them aside and then did the dates. Next I tossed the cocoa and maple syrup in with the dates and then began sprinkling in the hazelnuts. Just when I thought everything was lost, I tossed everything in a bowl and finished up with my hands. It looked perfect. 


Pack the dough into a ball and then roll it out between two sheets or parchment, shaping it to be cut into brownies. With a sharp knife cut the dough into equal sized rectangles. With the extra dough, re-form into a ball and repeat. 

I halved the recipe when I did it, so you'll likely have a lot more to roll our than what's pictured above.


Make the icing by blending the avocado, cocoa and maple syrup. Blend until velvety smooth and adjust the sweetness to your liking. Once the icing is ready, frost the brownies stacking pieces by two. Garnish with crushed hazelnuts.


Friday, February 24

Food Friday: Vegan Marble Banana Bread


I am very excited to announce my second-ever pinterest recipe adventure was a delicious success! If you follow my pinterest, you'll know that the majority of my pins are of food and so I can't help but celebrate each time I manage to make one a reality [I want to eat. it. ALL.].

I love banana bread, always have always will. It's deliciousness is the only reason I can even stand saying the worst moist [ugh. that was hard and gross -that's what she said... I digress]. The point is, when I saw this pin and knew that I could up my game to include a chocolate - but not too chocolatey - banana bread, I nearly passed out from excitement. 


INGREDIENTS: 
1 cup mashed banana
3/4 cups sugar
1 teaspoon canola oil
1/3 cup almond milk
1 1/2 cups flour

3/4 teaspoon baking soda
3/4 teaspoon salt
3 tablespoons unsweetened cocoa powder
6 tablespoons boiling water, divided

Begin by boiling the water and preheating the oven to 350 F. Next, start mashing your naners in a large bowl, beating in the sugar, oil, milk and vanilla. Set aside.

Sift your flour, baking soda and salt - not because it's fun, but because you know it's worth it. Gently mix the flour into the wet ingredients.


Now, here's where things get crazy. Separate half of the batter into another bowl. In a small bowl mix the cocoa powder with 3T of the boiling water. Once this has dissolved into delicious hot cocoa water mix it into one half of the batter, creating that chocolatey goodness. Once this is mixed, add the remaining 3T of boiling water to the boring ol' plain batter and mix.

At this point, you should have two bowls of batter. Begin added them to your nicely buttered, lightly flour-dusted pan, one half cup at a time layering the chocolate with the plain. Once all your batter is in there take a knife and swirl it around the length of the pan -don't let it drag on the bottom though.

Put it in your preheated oven and voila! 55 minutes later [more if your oven is sneaky] you've got a delicious marble banana bread! ...and since it's all vegan and healthy you can pretty much devour that thing start to finish right from the oven. Enjoy!


Notes:
Just because it's vegan doesn't mean it needs to have a weird rubbery texture!
Hurray for finding healthy recipes that also taste good!!

Since it's vegan you'll need almond, soy or rice milk instead of regular. Ooo! Also, you could try coconut milk. Any would do and they're all pretty fantastic to bake with.

Sift the flour twice. This always helps with cakes and muffins and since eggs aren't included in vegan recipes, the sifted flour will definitely help lighten the batter.

Friday, February 3

Food Friday: S'mores Bars


Yes, you heard right; S'mores bars. They exist, it's not a dream. I know, I did a double take the first time I got wind of this too. In fact, I think I yelled at my screen "I've been dreaming of this day for so long, it can't be true." But they are. They are true. And they are DELICIOUS. I've been a fan of s'mores since I had my first one three years ago - yeah I know, sheltered - but I've never cared for the uneven melting a campfire offers. With s'mores bars, there is none of that NONSENSE! My thinking is, this is a little taste of what heaven would be like.

Don't actually use marshmallows. I tried it and they disintegrate. But they sure are pretty.

INGREDIENTS
1/2 cup butter, room temperature
1/4 cup brown sugar
1/2 cup sugar
1 large egg
1 tsp vanilla 
1 1/3 cups flour 
3/4 cup graham cracker crumbs (approximately 7 full graham crackers)
1 tsp baking powder
1/4 tsp salt
2 or 3 super-sized (5 oz.) chocolate bars
1 1/2 cups marshmallow creme/fluff (not melted marshmallows)

Preheat oven to 350 degrees


Cream together butter and sugar until light. Beat in egg and vanilla. In a small bowl, whisk together flour, graham cracker crumbs, baking powder and salt. Add to butter mixture and mix at a low speed until combined. 

Grab a 8 x 8, or 11 x 7 pan. Butter it. Butter it good. Divide dough in half and press half the dough into an even layer of your pan. Next lay down the full chocolate bars and then begin to scoop the fluff in a layer on top.


As tough as it's going to be, do not eat the chocolate bars before you get a chance to use them in the recipe. I started in on them, which is why you see all the chocolate evenly spaced in chunks around the dish, that and my low-level OCD of course. This is not the best way to go about it. The fluff is sticky and a life-ruiner. If I had been able to control myself and not give into that sweet, delicious, milky Cadbury the fluff debacle may never have been and I'd be a different person today.

Now I didn't take photos of the next, difficult and irritating part, but you can go here to see how it's done. I apologize for leaving it out but I was slightly cranky. It's actually not too hard to roll out but getting it from the saran wrap to the top of the fluff is super fun (italics = sarcasm).     

Bake for 30 to 35 minutes and then let cool completely.


Finally, make sure that you can bring these to your office, a party or a friends' house or else you will eat them ALL. You may enjoy it at first, but believe me, your tummy will turn on you later.

Friday, December 16

Food Friday: Peanut Butter Cookies

I've gotta level with you. I've been thinking about it, and I just do NOT like the sound of Matrimonial Monday. I just don't. It sounds old, matronly and quite frankly, as though Jack and I are in for a great big bore come our big day. I just can't have that. Especially, since I will be posting more and more about our wedding planning in the coming months and I don't want to fall asleep at the thought of doing it.
Obviously, my sights are set on Wedding Wednesday as the replacement. Unfortunately this means I have to change What I Ate Wednesdays to Food Fridays. This is a bit of a bummer for me because I've really grown to love the flow of What I Ate, however sometimes a girl has got to compromise. LAME, right? In any case, thems the breaks.

And so, on account of the holiday rush and my slackness of blogging this week, I present to you the first FOOD FRIDAY! (Hope you're all on board!)
----------------------------------------------------------------------------------------------------

I am a huge fan of peanut butter. 
Reese's pieces, peanut butter cups, peanut butter fudge ice cream -
I love it all.
ALL of it.


Don't believe me?
I used to spoon feed it to my sister when we were little.
I wanted her to love it as much as I did.
Now, before you worry about the potential of pint-sized heart attacks -
the peanut butter was all natural. That's right folks, we were raised by hippies.


As much as I love peanut butter, and as easy as these cookies are to make,
I've had very little experience actually baking peanut butter cookies.
Growing up, my mom made baked, but never with peanut butter.
She just didn't like it in things. Weird. It's not even like she's allergic.
I mean seriously, who doesn't like peanut butter 
besides those who are afraid of it and it's deadly abilities!?


In any case this cookies existence often fails to make it to my radar 
so when the idea popped into my mind, and I had all the ingredients,
I was excited.
I may have done a dance.
Nothing big, but a dance all the same.


If you think these look delicious (and you should), 
check out the full recipe here, at the Brown Eyed Baker; she's the bestest.

Wednesday, November 2

What I ate: Simple Summer Pear Cake


This recipe could also be called "Simple Brunch Pear Cake" 
or "Simple High-tea Pear Cake" or "Simple Midnight Snack Pear Cake" 
because seriously, this cake is a social butterfly 
that can be taken anywhere and eaten at any time.

...although maybe don't show up at your friends' house for a midnight snack. 
You might scare them, especially if they  watched  just watched Paranormal Activity 
3 years ago  and are still a little jumpy. 
Best to stay at home with your cake and avoid any unpleasant taser-ings.


The original recipe, found on ol' trusty - food52 - called for peaches rather than pears.
However, when a gal buys a basket of pears because they look oh-so-pretty, 
she's got to get creative with how she uses them after a while.
So, pears it was. And it worked great.

Chop pears and then toss in sugar and nutmeg.
Only 2 tablespoons of sugar though - Jack got excited and mixed it with the full cup.
It was no fun rectifying that mistake.


Next, combine your wet ingredients.
Luckily today, I was NOT baking while tired (my version of My Drunk Kitchen), 
so this went relatively smoothly - no mishaps, no nonsense.


Mix the dry ingredients. 
Note: Almond flour does not sift well... don't waste your time.
It's annoying, should've known.
After, combine the wet and dry ingredients.


There's not much batter and it will usually just plop in the centre; 
be prepared to spread with a spatula. 


You've caught me. I use my hands while cooking and baking. 
Why not? It's easier. Also, it's more precise, and when you've got a slight case 
of the OCD like me, preciseness beats hygiene.
Although, I totally wash my hands first... but not in an OCD way.
My OCD focuses more on order and organization than germs and the like.

Back to the cake.

I like a lot of pears. I cut up wayyyy too many pears.
That being said, I definitely could have fit a few more pieces into this cake.

I started rambling, full recipe: here.


Notes
You can fit more pears in than you think you can.

Using only 3/4 cup sugar rather than the full cup would help brunch-i-fy this cake.

I find it usually needs an extra 5 - 10 minutes baking time in my oven.

It doesn't call for almond slivers, but they sure make it look fancy
...and taste good, obviously.

Wednesday, September 14

What I ate: Chocolate Zucchini Cake

While trying to decided which recipe to share with you today, I realized that I haven't posted anything sweet in a while. I found this to be a very surprising discovering considering how many sweets I actually eat during the run of a week. In any case, since I have been snapping photos like a mad woman every time I step in the kitchen I knew just what to share with you!

I made this cake at the end of August after a trip home to the valley where my mother gave me this monster. Needless to say, zucchini was on the menu and I needed to get creative.


I really struggled when naming this post, because after all Jack and I went through to make this cake, 
it should have been called 
"Why you shouldn't bake (or cook) while sleepy and other obvious statements".


This experiment began innocently enough.
After three days of the giant, monster zucchini mocking me from the kitchen counter 
I had finally had enough; it was time to conquer the legume.
Since time was of the essence (it was past 7pm, after all) 
we quickly logged onto food52 and scoured its pages for a worthy zucchini cake recipe, finally settling on this little ditty because it looked delicious AND we had all the ingredients.


The prep was easy. 
We melted the chocolate. 
Then we separated the egg whites from the yolks, 
mixing the yolks in accordance with the recipe and whipping the whites to be folded in later
- it adds air to the batter, making the cake lighter.
Then we accidentally added the sugar into the dry ingredients
...that's not where it goes.
This is where the trouble began.


Next, we combined the dry and wet ingredients
...only we forgot all the wet ingredients, except for the yolks.
So we mixed.
And mixed.
And thought: 
sheesh, separating the whites and yolks really did not go over well.
And while we were pondering our mistakes, 
I remembered the melted chocolate on the stove, and the oil poured in the cup. 
Silly us.

Then the mixing got easy.
Except that I tried to salvage every last bit of melted chocolate 
...and burnt my finger.


You'd think the trouble would have stopped there - it should have stopped there - but it didn't.
No sir.
I was checking the bake time when I noticed it was to be baked in a tube pan
a tube pan?
We must have a tube pan. How could we not have a tube pan?
We did not have a tube pan.
I insisted we go buy a tube pan.
It was 9pm.
We jumped in the car and headed for our Superstore.
Construction thwarted us, sending us on a long, unfortunate detour.


After a few unsuccessful stops, we had our tube pan and were back at home filling it with batter.
Luckily, our troubles ended with the purchase of our tube pan - the cake was delicious.


Notes:
Don't mix your sugar into the dry ingredients.

Don't forget the wet ingredients when combining, wet and dry ingredients.

Feel free to separate the eggs and yolks.
It won't work as well as with a cake batter without large pieces of grated zucchini,
but it still adds some air and lightness.

Don't try and salvage every last bit of chocolate. 
This cake is super chocolatey and it's not worth the pain.

Own all your pans before beginning
- OR -
check your low-level OCD at the door